Graveyard Keeper: How Graphics Effects Are Made.
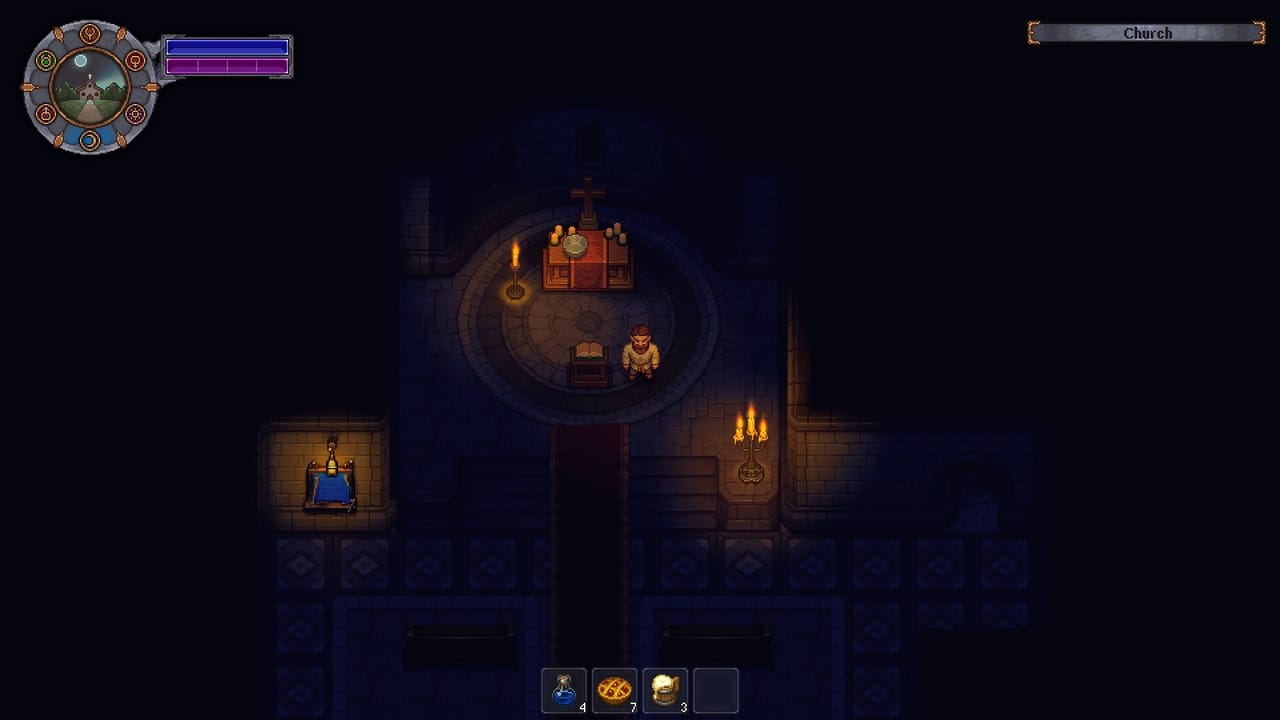
We are very passionate about the graphics in our games. That’s why we put so much time and effort into various effects and other elements that make our pixel art as appealing as possible. Hopefully, you’ll find something here that can be helpful for your work.
First, I want to say a few words about the key components that make up the visual aspects of our game:
- Dynamic ambient light: The illumination changes depending on the time of day.
- LUT color correction: Adjusts color shades based on the time of day or the specific world zone.
- Dynamic light sources: Torches, ovens, and lamps.
- Normal maps: Create the illusion of real volume, especially when light sources move.
- The math of light 3D distribution: A light source centered on the screen should illuminate higher objects properly while avoiding lighting objects below (those turned toward the camera with their darker side).
- Shadows: Made with sprites that turn and react dynamically to the positions of light sources.
- Object altitude simulation: Ensures that fog is displayed correctly.
- Other elements: Rain, wind, animations (including shader animations for leaves and grass), and more.
Let’s now dive into more detail about these components.
Dynamic Ambient Light
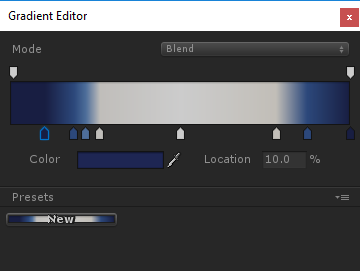
Nothing groundbreaking here: it’s darker at night and lighter during the day. The light’s color is set using a gradient. By nightfall, the light source not only becomes dimmer but also takes on a blue tint.
It looks like this:
LUT color correction
A LUT is essentially a table for color transformation. To put it simply, it’s a three-dimensional RGB array where:
- Each element corresponds to a color based on its RGB coordinates.
- Each element contains the color value that the corresponding color should be changed to.
For example, if there’s a red point at coordinates (1, 1, 1), it means that all white in the image will be replaced with red. However, if there’s white at the same coordinates (R=1, G=1, B=1), no change occurs. By default, a LUT associates each coordinate with its respective color. For instance, a point with coordinates (0.4, 0.5, 0.8) represents the color (R=0.4, G=0.5, B=0.8).
It’s also worth noting that, for convenience, this 3D texture is represented as a two-dimensional texture. Here’s an example of how a default LUT (which doesn’t alter colors) looks:

Easy to create. Easy to use. Lightning-fast performance.
Setting it up is straightforward: you provide an artist with a screenshot from your game and say, “Make it look like it’s evening.” The artist applies all the necessary color adjustments to the image (filters in Photoshop), and then you apply those adjustments to the default LUT. Congratulations! You now have an Evening LUT.
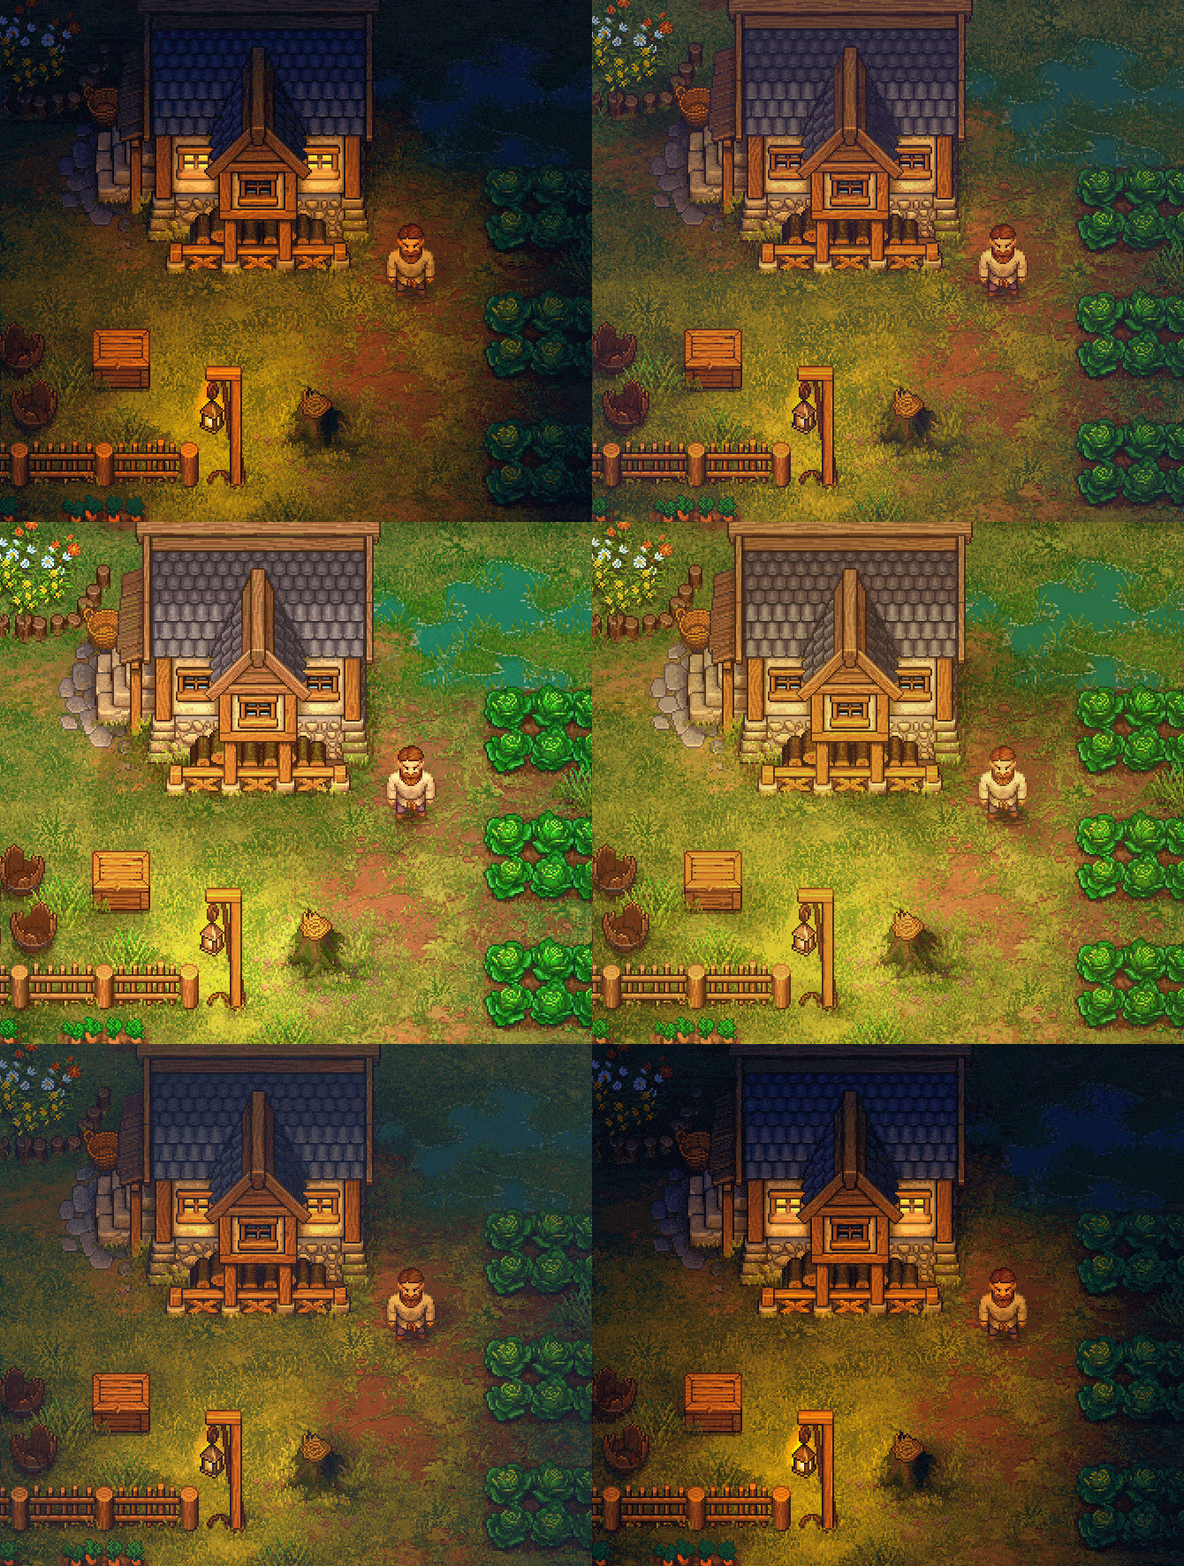
Our artist was really passionate about this process. He ended up creating 10 different LUTs to represent various times of day—night, twilight, evening, and so on. Here’s what the final set of LUTs looks like:
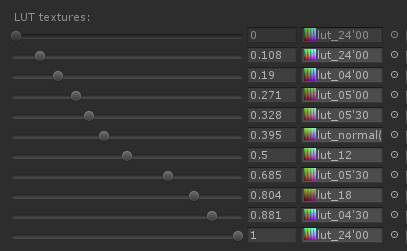
As a result, a single location can look completely different depending on the time of day:
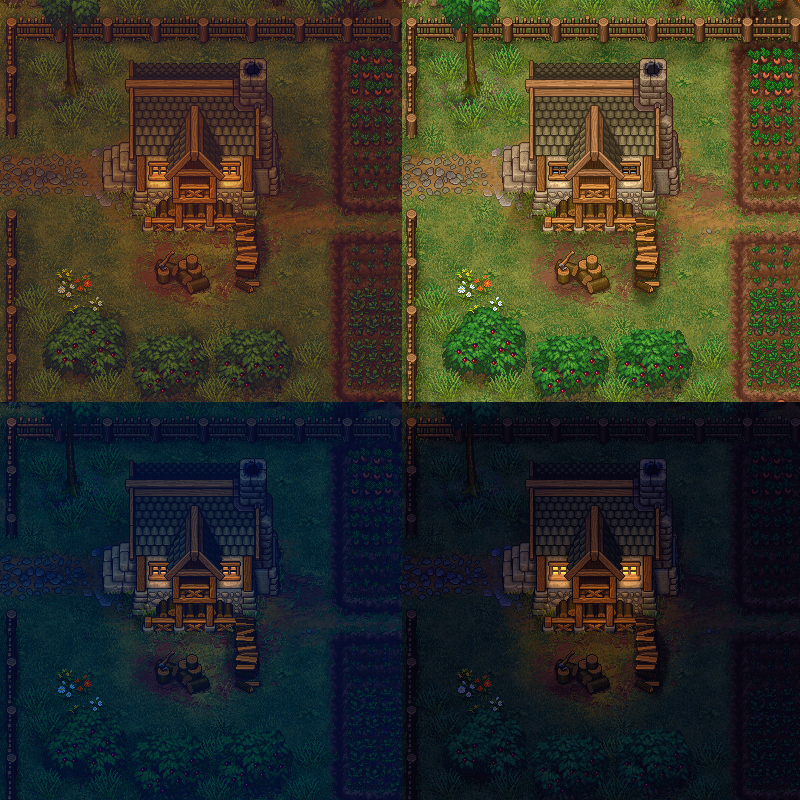
The image also demonstrates how the intensity of the light sprites varies depending on the time of day.
Dynamic light sources and normal maps
We use standard light sources, the default ones provided by Unity. Additionally, every sprite has its own normal map, which helps create a sense of volume.
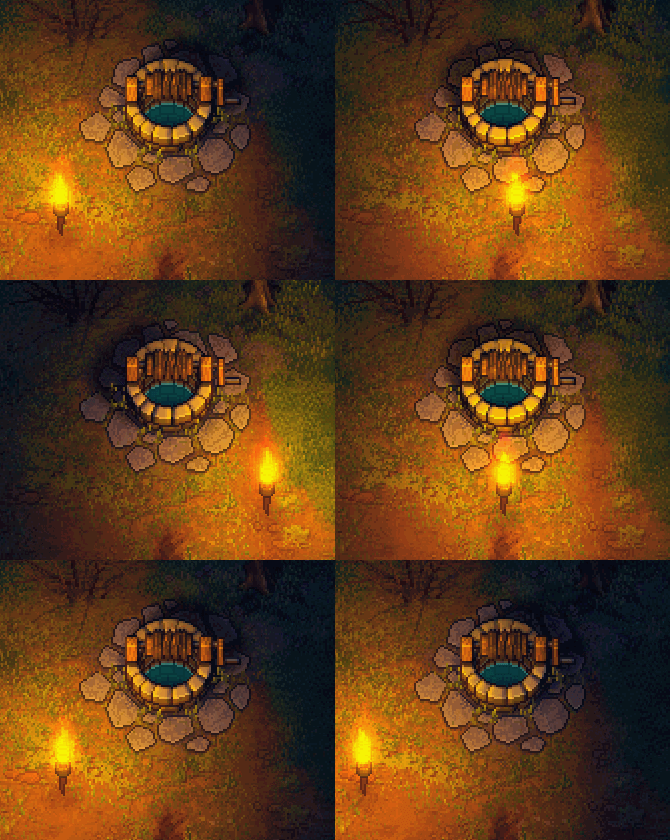
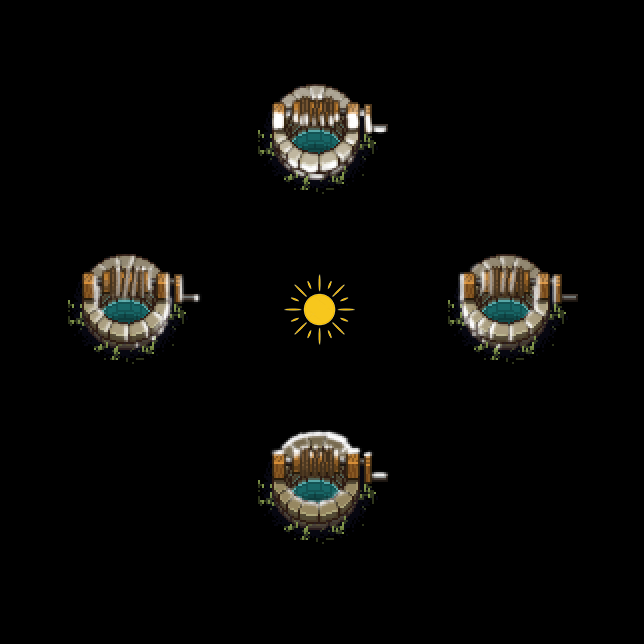
Creating these normal maps is fairly simple. An artist roughly paints the light on all four sides using a brush:
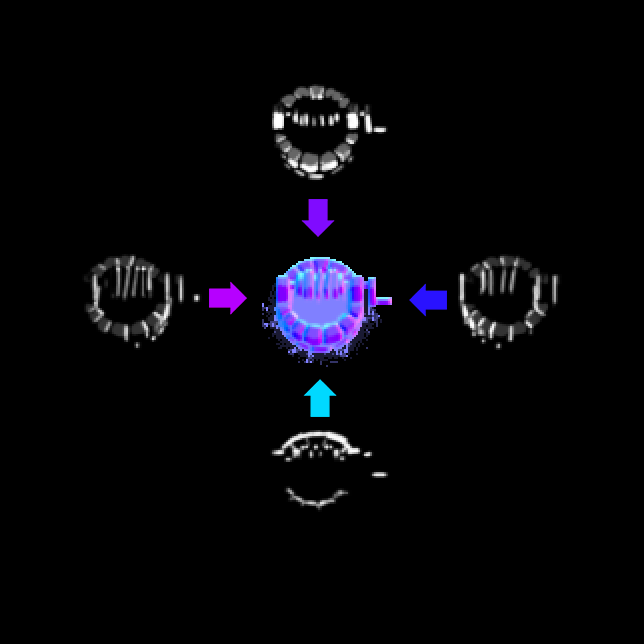
Then, we use a script to merge these into a normal map:
If you’re looking for a shader (or software) that can do this, check out Sprite Lamp.
3D light simulation
This is where things start to get a bit more complicated. You can’t simply light the sprites—it’s crucial to determine whether a sprite is “behind” a light source or “in front of” it.
Take a look at this picture.
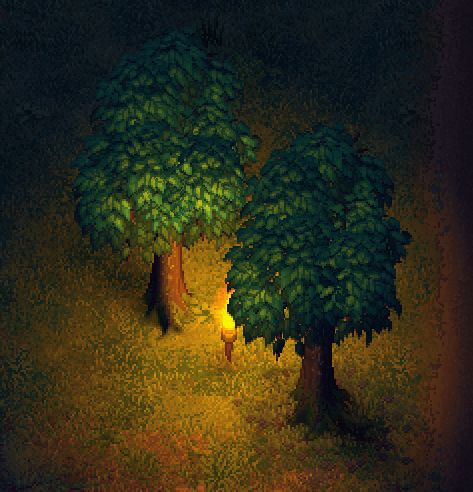
These two trees are at the same distance from the light source, but the one in the back is illuminated while the one in the front is not (because the camera faces its dark side).
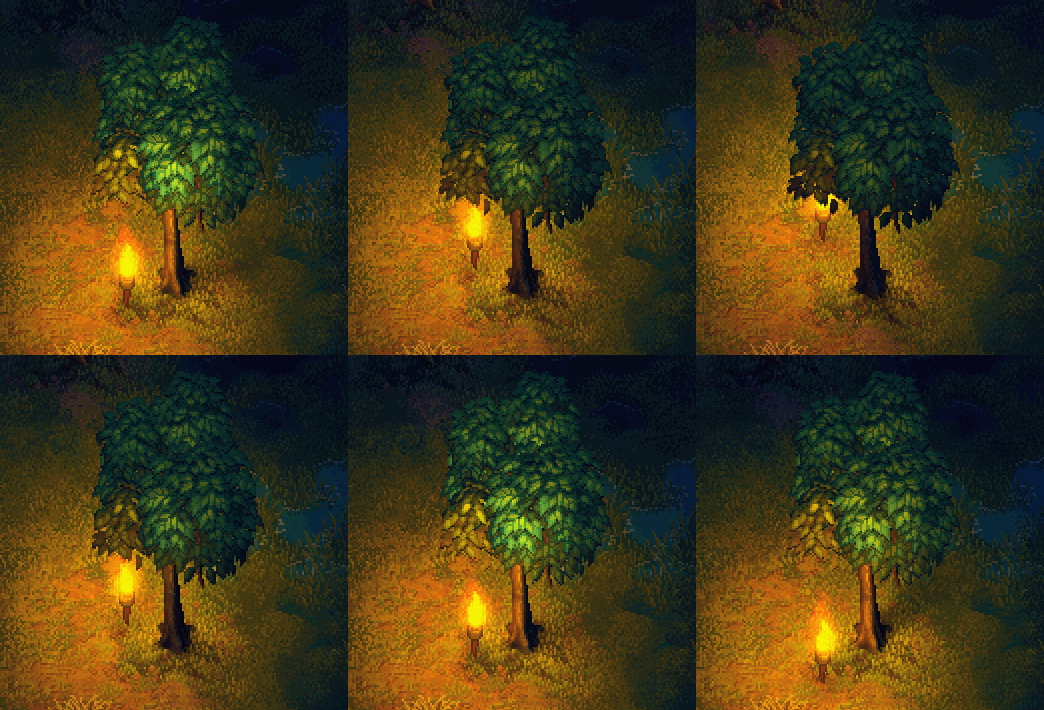
I solved this problem quite simply. The shader calculates the distance between the light source and the sprite along the vertical (depth) axis. If the value is positive (meaning the light source is in front of the sprite), we illuminate the sprite as usual. However, if the value is negative (indicating the sprite is blocking the light source), the intensity of the lighting fades rapidly based on the distance.
Instead of completely removing the light, it gradually decreases the intensity. This means that if the light source moves behind the sprite, the sprite darkens progressively rather than instantly. The transition is quick but still smooth.
Shadows
Shadows are created using sprites that rotate around a point. I initially tried adding a skew effect, but it turned out to be unnecessary.
Each object can have up to four shadows: one from the sun and up to three additional ones from dynamic light sources. The image below illustrates this concept:
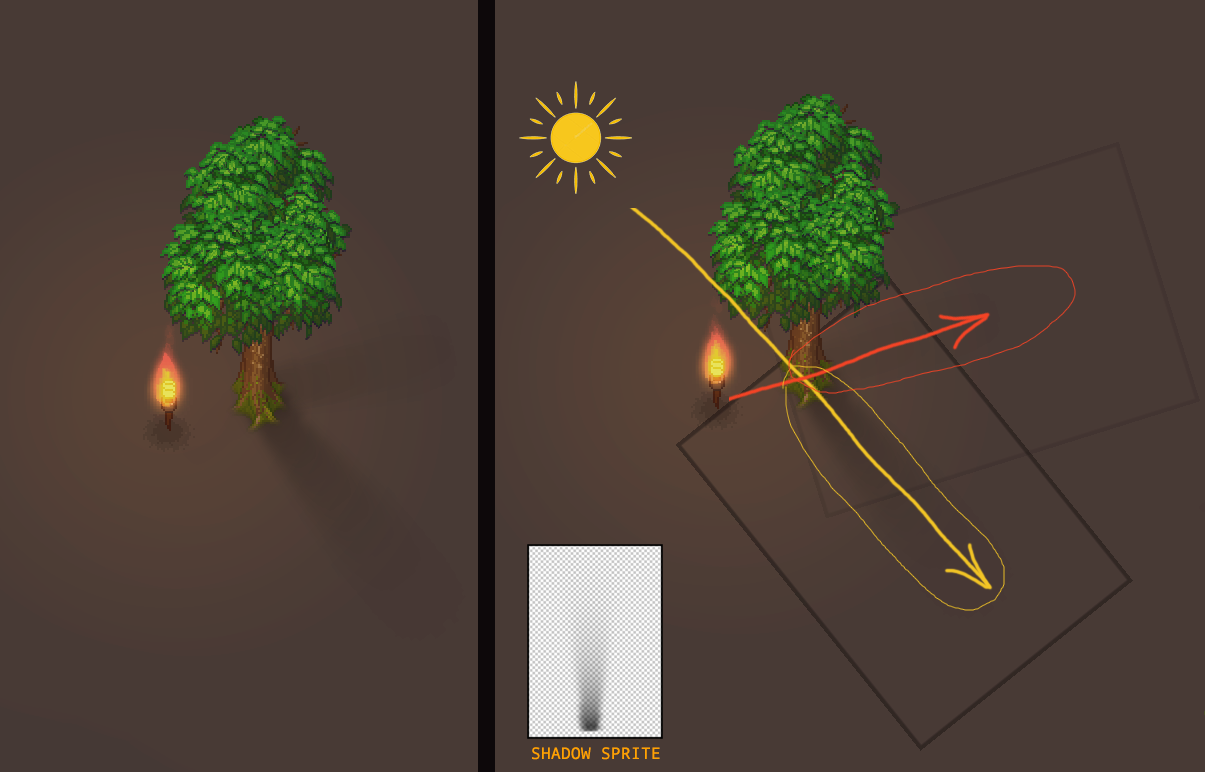
The problem of determining the three closest light sources and calculating their distances and angles was solved with a script running in the Update() loop.
This approach isn’t the fastest, considering the amount of math involved. If I were to implement it today, I’d use the modern Unity Jobs System. However, at the time, that wasn’t available, so I had to optimize the regular scripts we had.
The key point here is that the sprite rotation isn’t done by modifying the transform—it’s handled within a vertex shader. This means the rotation doesn’t affect the transform directly. Instead, a parameter is passed to the sprite (I used the color channel for this, as all the shadows are black anyway), and the shader manages the sprite rotation. This approach turns out to be faster since you don’t need to rely on Unity’s geometry.
However, there is a downside to this method. The shadows need to be adjusted (and sometimes drawn) separately for each object. That said, we ended up using about ten different, more or less universal shadow sprites (e.g., thin, thick, oval, etc.).
Another disadvantage is the difficulty of creating a shadow for an object stretched along one axis. For example, take a look at the shadow of the fence:
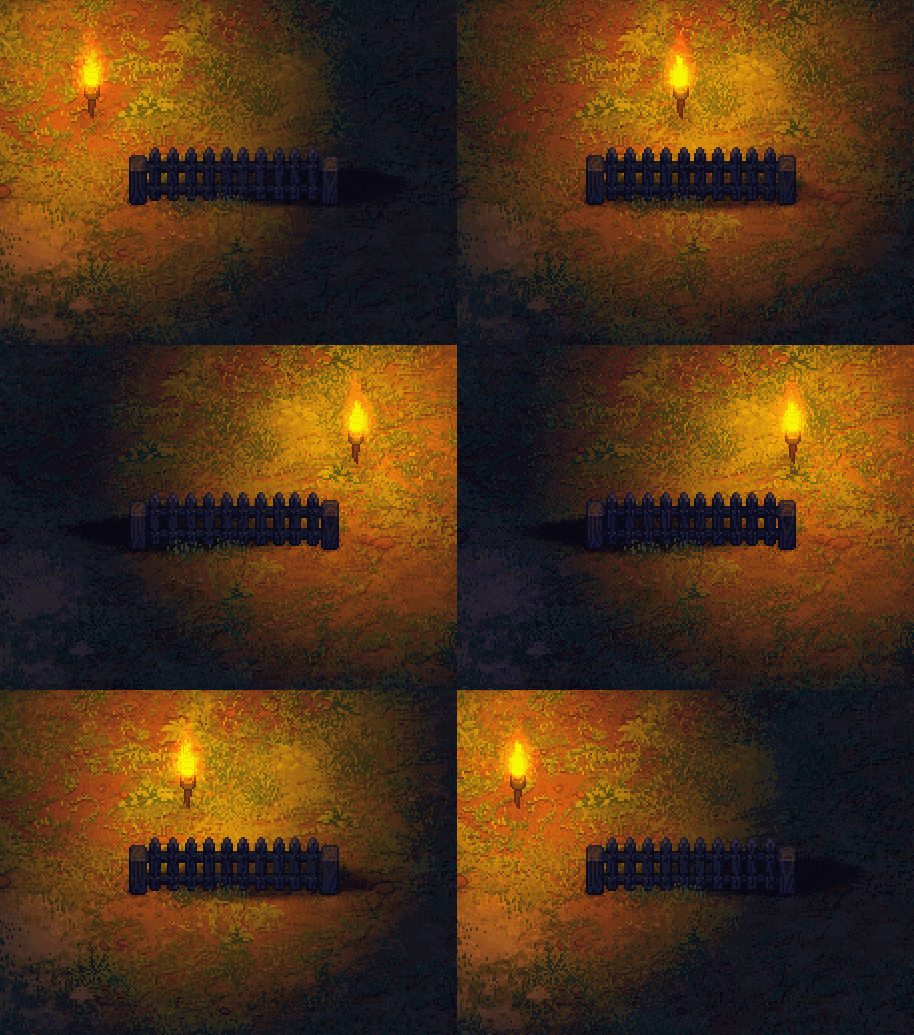
Not ideal. This is what it looks like when you make a fence sprite translucent:
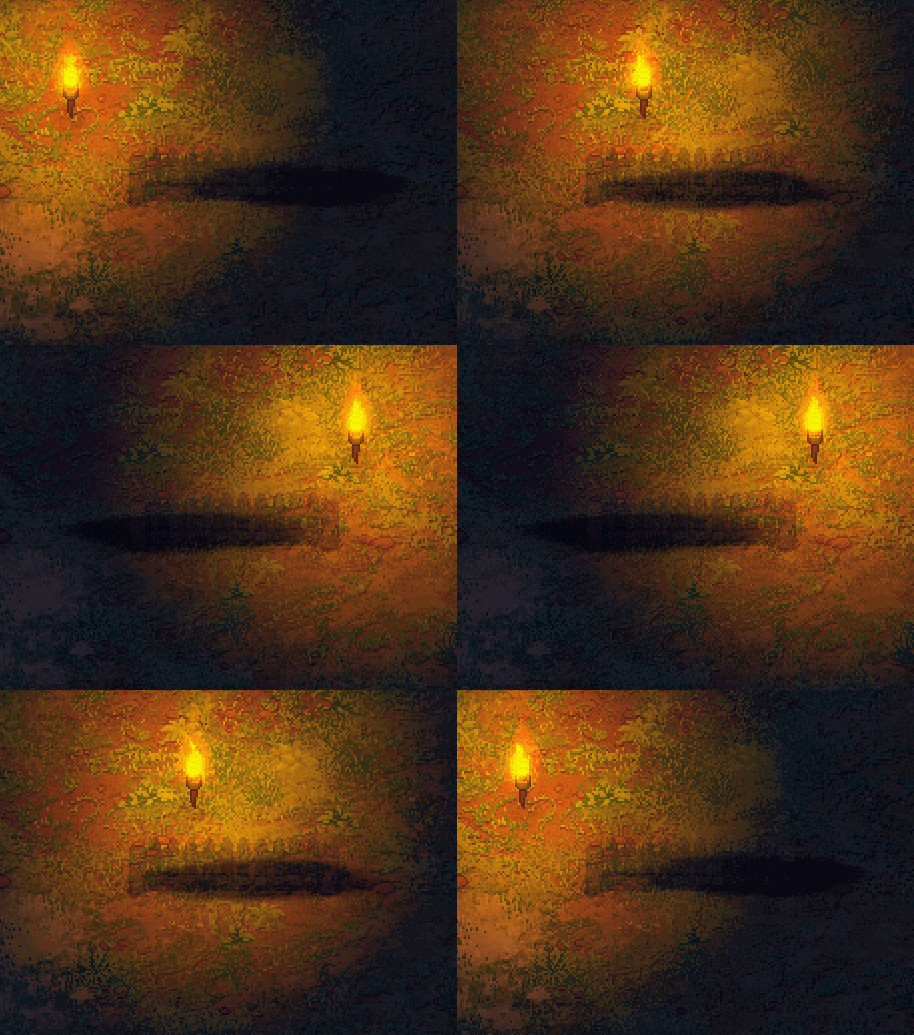
It’s worth noting that the sprite is highly distorted vertically (the original shadow sprite looks like a circle). This distortion makes its rotation appear not just as a simple rotation but also as if it’s being warped.
The fog and the altitude simulation
There’s also fog in the game. It looks like this (the regular version is shown above, along with an extreme 100% fog example to demonstrate the effect).
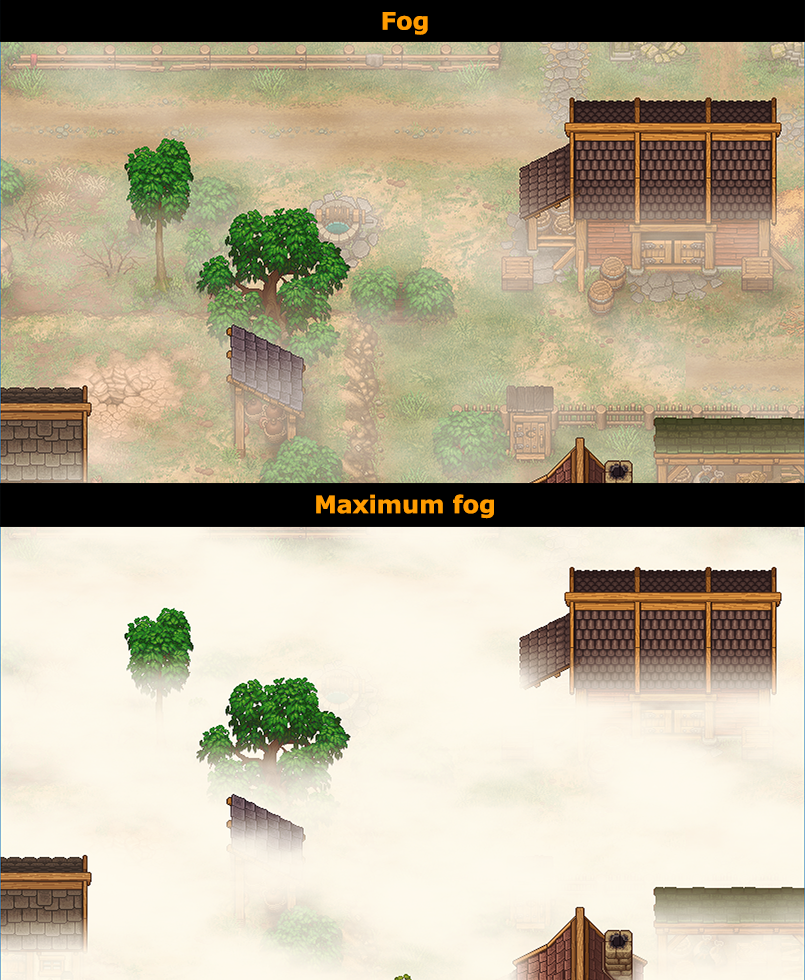
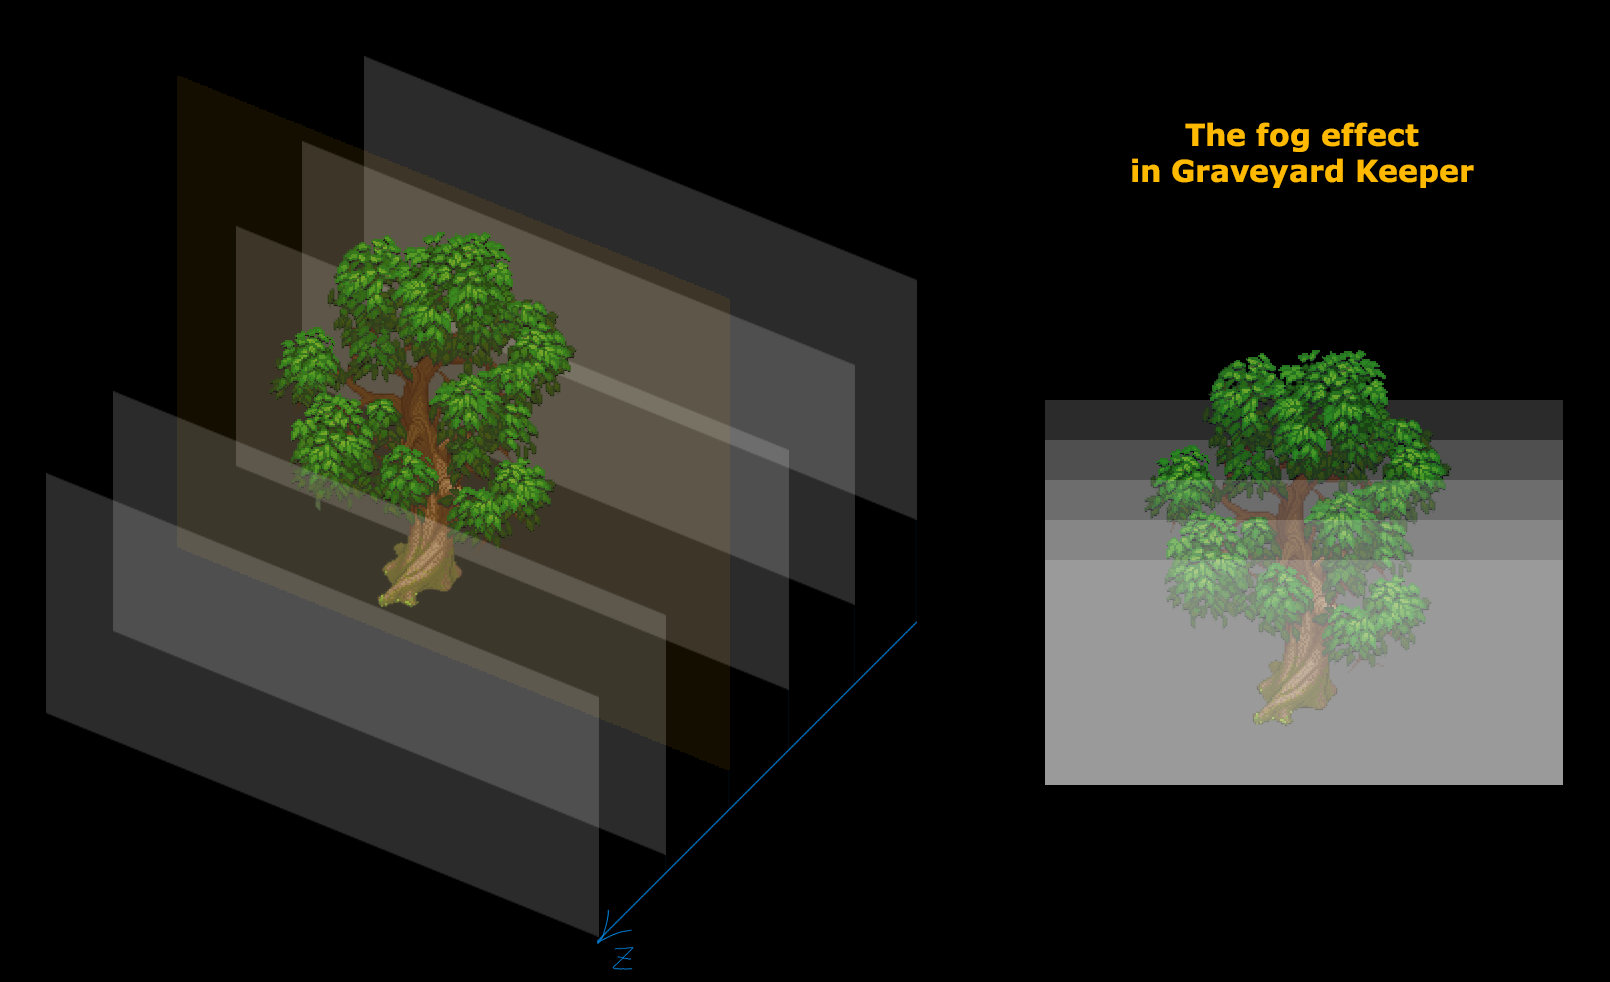
As you can see, the tops of houses and trees remain visible through the fog. In fact, this effect is quite simple to create. The fog is made up of numerous horizontal cloud layers spread across the entire scene. As a result, the upper parts of the sprites are covered by fewer fog layers:
The wind
The wind in a pixel art game is a completely different challenge. There aren’t many options available: you could animate everything manually (which isn’t feasible given the amount of art we have), or use a deforming shader—but that often results in some ugly distortions. Alternatively, you could skip animation altogether, but that would leave the scene looking static and lifeless.
We chose to use a deforming shader. It looks like this:
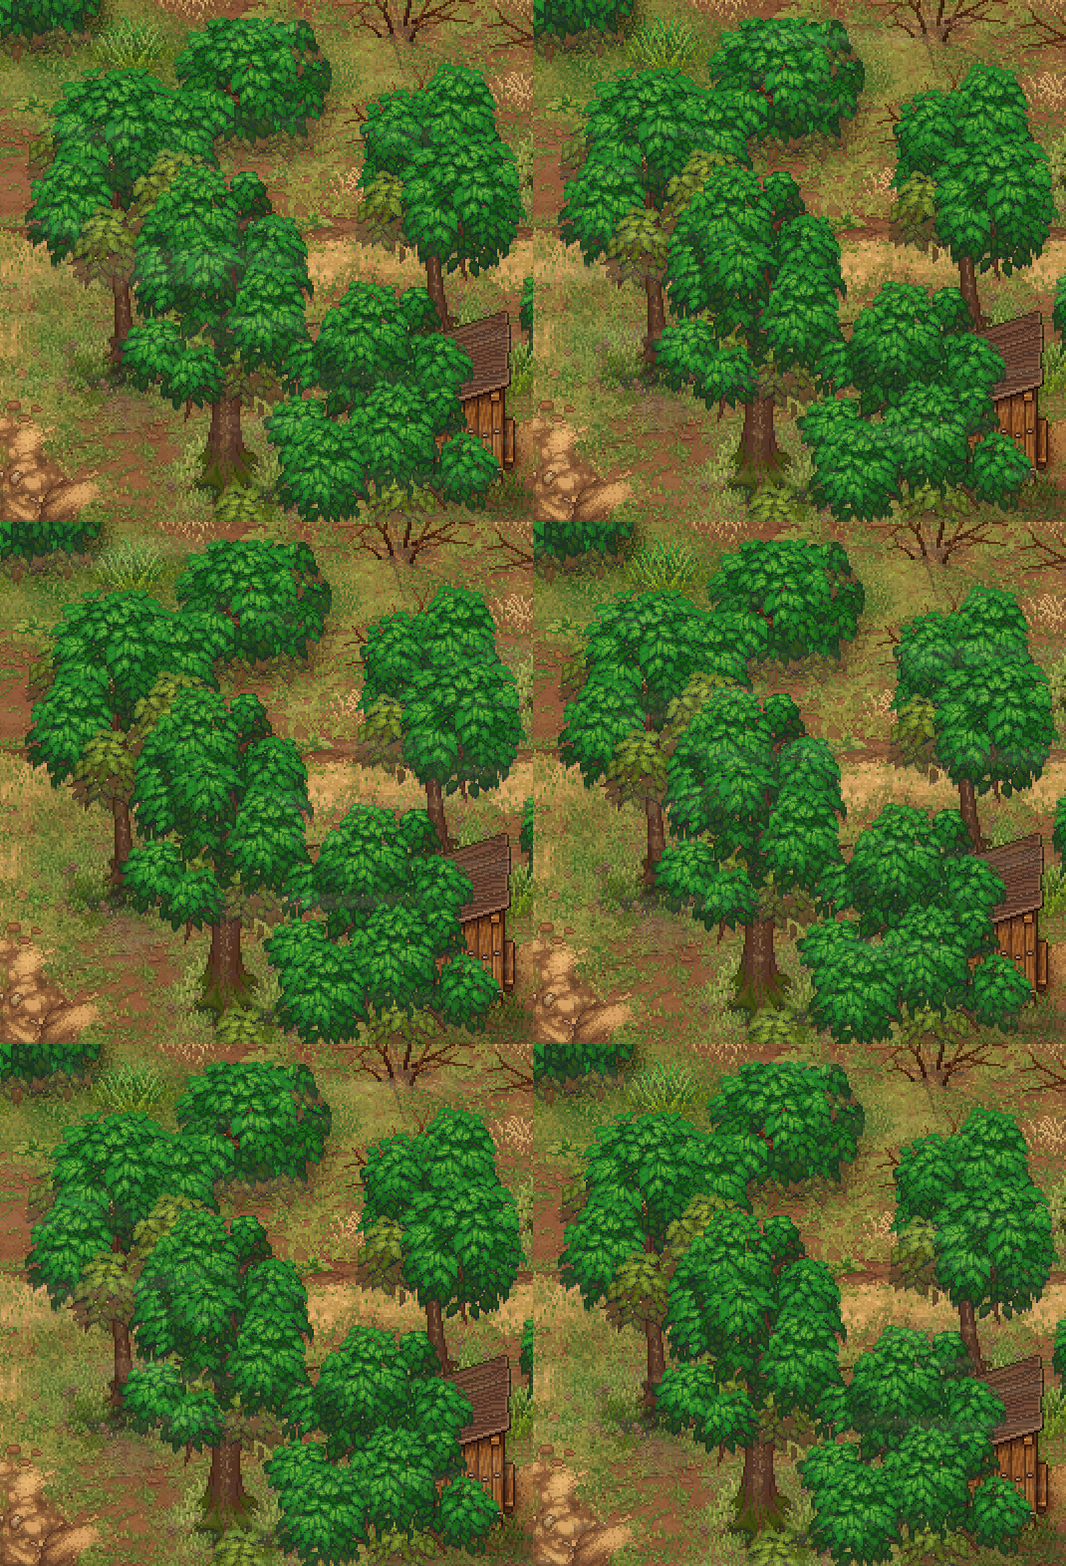
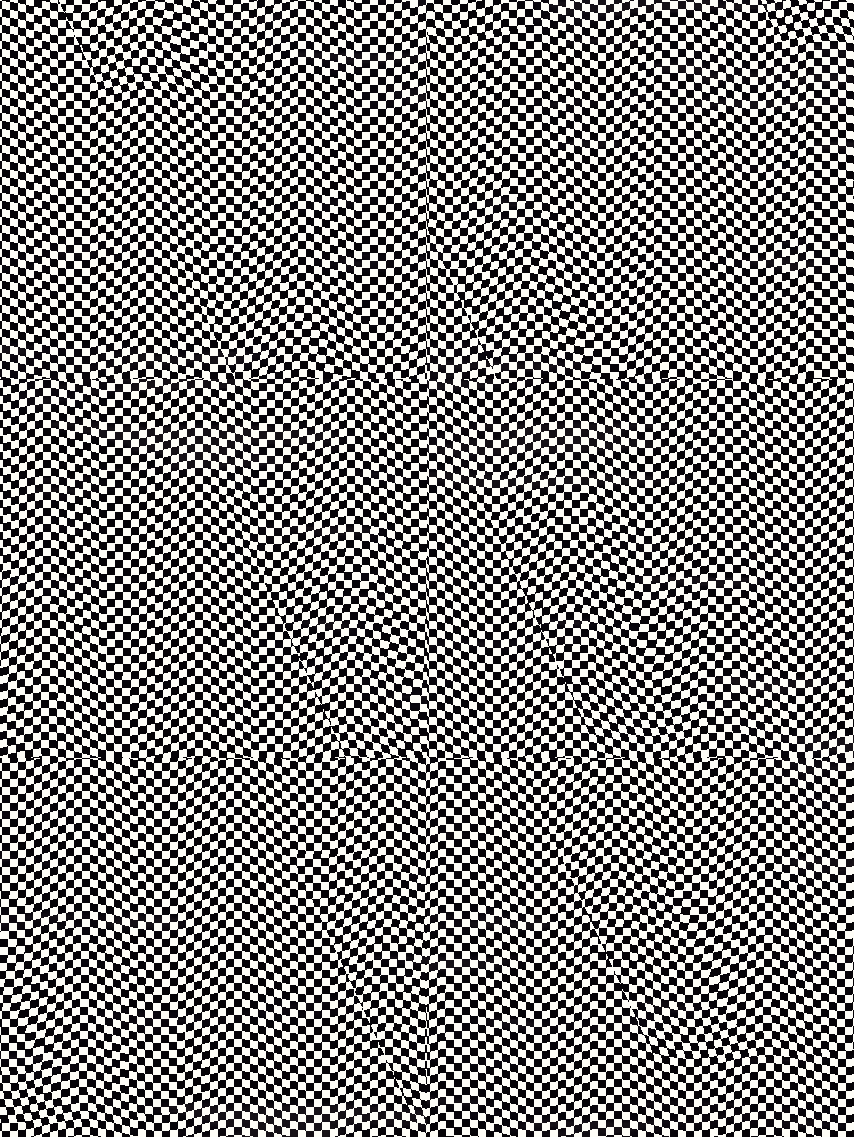
It’s pretty clear what’s happening here when the shader is applied to a checkered texture:
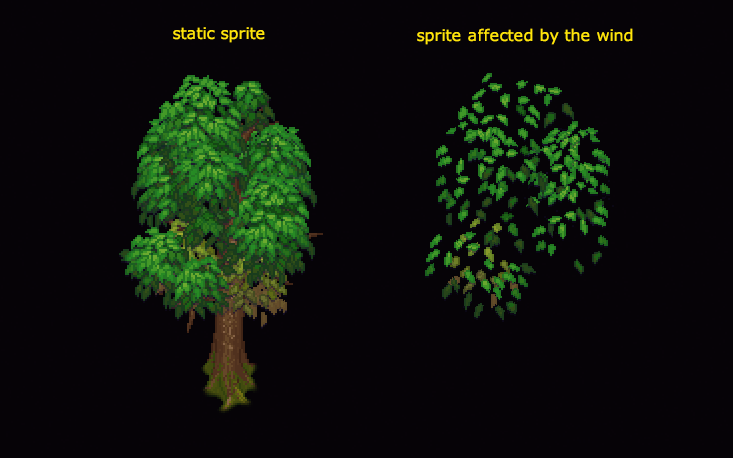
It’s worth noting that we don’t animate the entire crown of the tree, but only specific leaves:
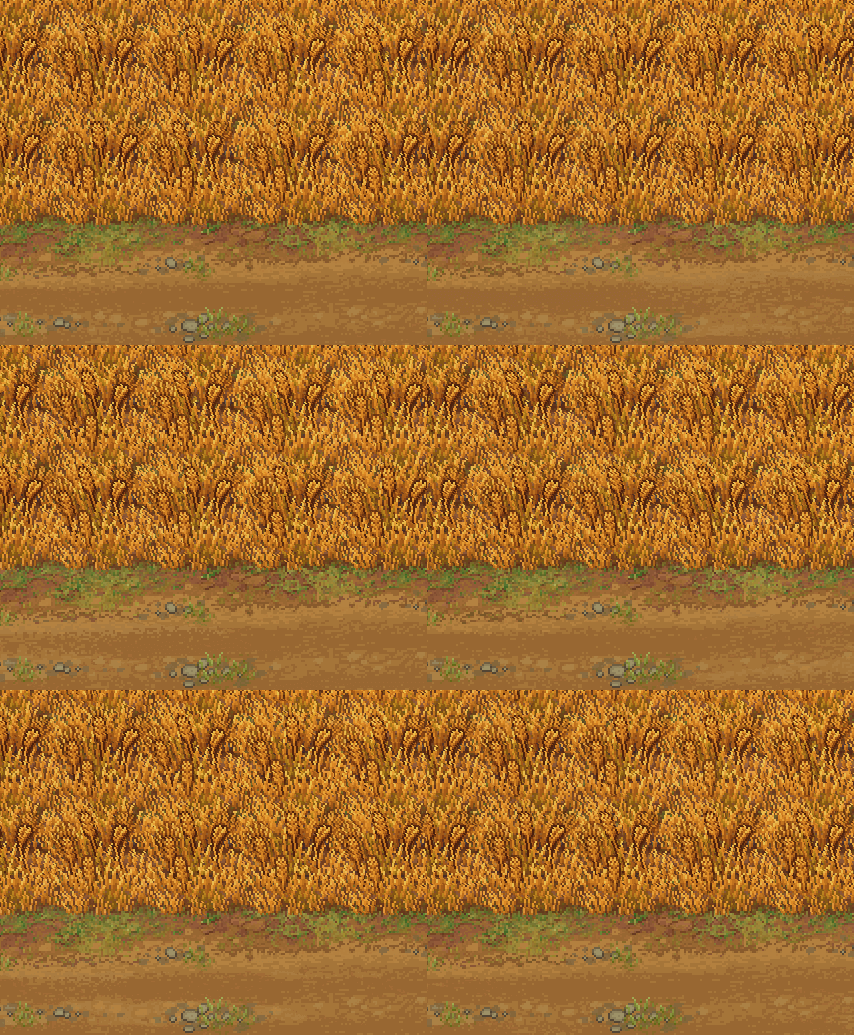
There’s also an animation of a wheat field swaying, and the approach here is quite simple as well. The vertex shader modifies the x-coordinates based on the y-coordinate. The highest points are shaken most intensely, while the roots remain stationary. The idea is to create movement at the top without affecting the base. Additionally, the phase of the shaking varies according to the x/y coordinates, making individual sprites move independently.
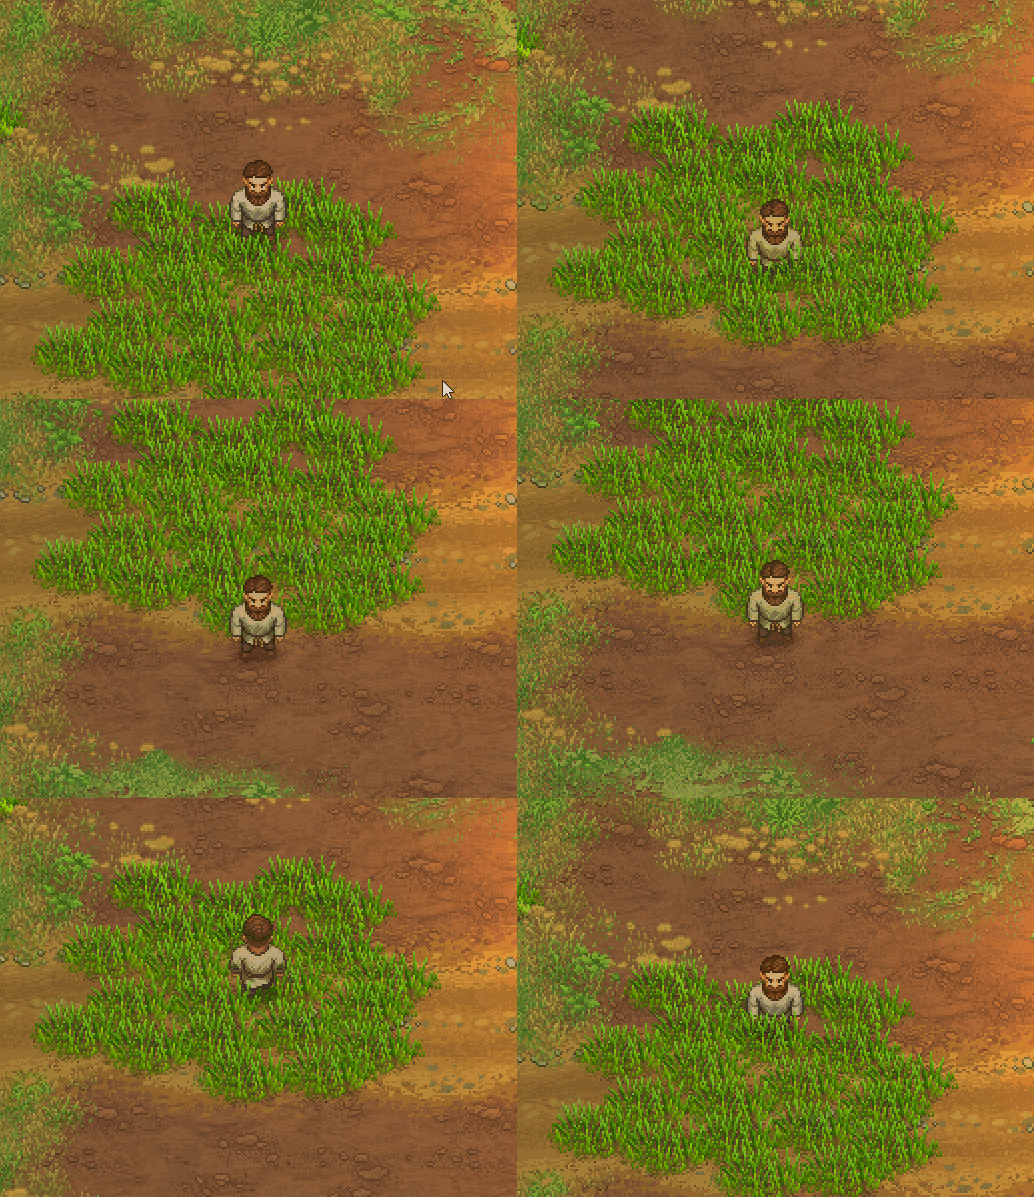
This shader is also used to create a swaying effect when the player moves through wheat or grass.
I think that’s all for now. I haven’t touched on scene construction or geometry, as there’s a lot to cover, which I’ll save for a future entry. Other than that, I’ve discussed all the main solutions we applied during the development of our game.